
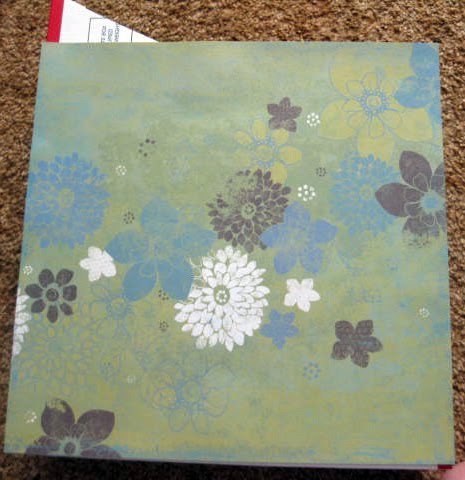
I just completed an altered project for storing paper that I would like to share with you. Because I was running out of resources for storing my massive amounts of paper, I had to resort to another method and that was creating this box that will sit on a shelf in my scrap room. I hope you will create one (or several) and share them on your blogs. If you do, let me know! I'd love to see them. So, here we go.....
Gather your materials:
One (or more) Priority Mail Boxes (Medium Flat Rate)
Scisssors
Ruler
Strong Adhesive
2 Coordinating Designer Papers
Step 1: Close one end of the box


Step 8: You'll notice that there is one part of the box uncovered in the top corner. Use the excess paper
that you trimmed off and adhere it to this spot. Trim. Do the same on the opposite side.


12" x 3 1/2" . There will be about 2" not covered on the top. Cut a piece approx. 1 3/4" x 3 1/2" to cover this spot.
Step 11: Ink all edges (optional)


You can add a decorative tag to the front as well. Have fun with this project. If you have any questions, just ask me!
Now you're ready to add your paper to the box! Good luck and have fun with this project. Sorry that some of the photos were posted upside down --I'm not sure why that happened. Oh, and the Priority boxes are FREE! Here's another photo of an altered priority box filled with paper. 

Have a great day, my friends!


5 comments:
That is an excellent idea. The best part is the boxes are FREE! yay! Thanks for the great idea!
What a great idea to repurpose something that so many would throw away. Who needs to go buy an organizer when they can be so easily made? Best wishes to you, Tammy
Lori~this is a positively brilliant idea!!! I just bought 3 VINYL paper holders the other day...this is so much classier!! I'm savingn this post for inspiration. I won't buy plasit again!
Thanks!
xoxo
Joyce
this is an awesome idea. I wish I would have seen this sooner. I get lots of scrap goodies in these boxes.
This is such a fabulous idea. It takes a truly creative mind to see this box and think to turn it into something useful. Love it!
Post a Comment