


Gather your supplies:
Paper trimmer with a scoring blade
Patterned paper (heavy weight and double-sided)
Cardstock (1)
Scissors
Pen or Pencil
Paper Piercer
Brads (2)
Adhesive (strong)
*Note: If you don't have double-sided patterned paper, choose a patterned paper and a sheet of cardstock (separate from the other) and adhere together as I did below

Trim off the excess cardstock. Your sheet should measure 4 1/4" x 12"
1. Score and fold the patterened strip. Attach the scoring blade to your trimmer. Set the patterned paper strip in the trimmer horizontally and score it 3 times fromthe left edge: at 1", at 6 1/2" and at 7". Bend at the score marks and fold the strip so it closes like a matchbook.


2. Cut and score your cardstock: Cut your solid cardstock into three strips, each measuring 4" x 12". Set one strip horizontally into the trimmer (the scoring blade should still be attached). Score the strip from the left edge at 5 1/2" and at 9 3/4". Score the 2nd and 3rd strips at 4 1/4" and at 8 1/2"


3. Cut off the smallest section off the end of the first strip (see photo of single strip above)

4. Insert the first strip into the matchbook. Starting with the first strip, insert the largest section, measuring 4" x 5 1/2") into the matchbook and center it under the short flap.

5. Insert the brads to secure. Mark 2 holes on the front of the short flap, about 1" from each end. Pierce the holes with the piercer from the front of the flap through the cardstock to the back of the matchbook. Insert brads from the front of the flap through to the back to secure the cardstock in place.


6. Attach the second and third strips of cardstock. Lay the matchbook horizontally. Take the second strip of cardstock and attach the right-most section (measuring 4" x 4 1/4") over the top of the left-most section (measuring 4" x 4 1/4") of the strip that has already been secured (the first strip).


Take the third strip and attach it to the second strip in the same way. Fold the pages into an accordion (with the moutain and valley folds), making sure that the four middle pages measure no wider than 4 1/4". Note: The left-most page will be 3 1/2" wide.


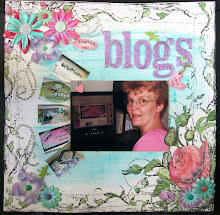
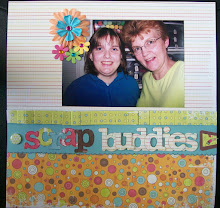
Now it's time to embellish your book. When embellishing your album, keep in mind that using lots of thick embellishments will keep the book from closing correctly. Felt shapes, stickers, and thin metal or acrylic elements work well as long as they're not place in similar locations on each page. Keep in mind that the spine of the album is meant to hold only a stack of pages less than 1/2". Here is how I decorated my album:


I hope the directions are clear enough for you. Happy Creating!


2 comments:
Way cool! I love it! Never did a matchbook before. I will have to try it. Thanks for sharing!
I gave it a try, they are quick and fast to make, once I read all the instruction. LOL will make more
Post a Comment