
All week, the Design Team and members of Creative Scrapbooking Divas have been sharing projects to inspire others to create something for their loved ones (or for themselves!). If you've just come here, not realizing there was a blog hop, please start at SANDY'S Blog. The main page of Creative Scrapbooking Divas will have the full list of DT's and members in the blog hop. If you haven't hopped yet, you should, as there are some great projects for Valentine's Day.
You will have until February 17th to upload your projects to my blog hop thread found HERE. I have posted examples of all 7 projects. I will draw a name via random.org for anyone who posts their project(s) in my blog hop thread by February 22nd. The winner will be notified on February 23rd. I have a nice little package of scrapping goodies for the lucky winner.
Now that the 'formalities' are done, let's get on with my project. Today I made a very simple accent/embellishment that can be used on cards, layouts and altered projects. Do you remember making tissue flowers as a child? I do. It was one of my favorite things to do with my friends. This is the same process but on a smaller scale.
You will need scissors, one twist tie and an assortment of tissue paper. You can use one color, but it looks better with 3 different colors.


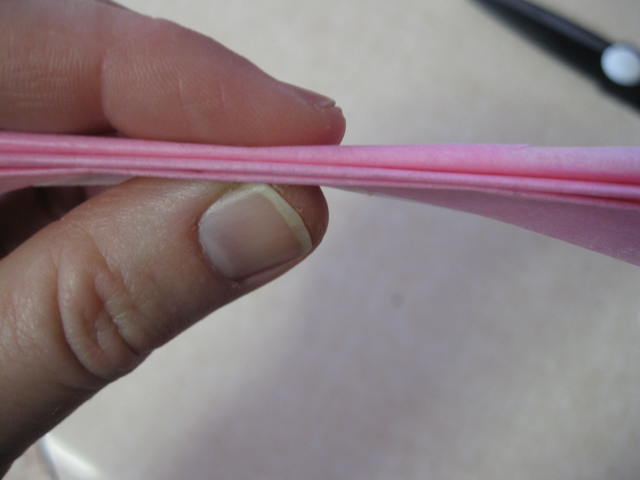

Next, trim the edges into a curved shape:


Play around with the flower to get the shape you want. I just manipulated it (gently) until it resembled a flower. You might have to 'squish' it around the bottom as well.

I wanted to add some 'extra' to this to make it look like a real flower, so I cut some leaves from scrap paper and also cut a circle (1") for a base. Glue the leaves to the base:


I hope you'll make some! These look great on layouts, mini albums, altered projects, tags, gift bags, etc. You can make these any size you want and you can make them from napkins as well. I even used dryer sheets!
Thanks for stopping by and have a great day! Please come back for Day 7's project.


1 comment:
OOOOOOOh! I LOVE these! Thanks Lori!
Post a Comment