Showing posts with label Other Paper Crafts. Show all posts

Sunday, May 19, 2013

Let's Catch Up--Shall We?

Hello bloggers:

I've been soooo busy!  The weather is getting milder and I'm loving it.  I'm outside as much as I can so my scrapping has been put to the side.   I can't believe that's it's been two weeks since I last posted so I'll do my best to catch you up on what I've been up to.  

First of all, I've been making samples of flowers for the bouquets for my daughter's wedding.  She's getting married August 17th so I want five bouquets done by the end of July.  I also have to make 7 boutonnaires.   Of course, with a wedding comes a bridal shower and my other daughter, who's the maid of honor, and I have been busy planning that as well.  I'm having a lot of fun with it too.  The shower is set for June 23rd and we're planning on a garden theme.   We'll have a tent set up outside by the pond that her future in-laws have in their back yard and I'll have paper lanterns hanging along with some whimsical flowers and butterflies.  It's going to be pretty.  I just can't wait!

I've also just finished up some swaps:  The "Green with Envy" Junk Journal swap over at Mini Album Scraps and the "Kitschy Flower Kit" swap over at Your Paper Pantry.   My partner for the junk journals was Evelyn Robinson.  I'll be doing a video of the journal she sent me tomorrow and will post on Youtube over the weekend.   Here's a picture of the one I sent to her.  


The theme for the Green with Envy Junk Journal swap was obviously green with some accent colors, but I wanted the journal to be about 80 percent green.  The other requirement was that about 50% of the pages had to be envelopes.  From what I've heard, all the swappers were very pleased with their journals they received.  I know I love mine!

The flower swap over at Your Paper Pantry was a lot of fun too.  We had to put together all kinds of items that we could use to make flowers and we could include handmade and store bought flowers as well.  I loved this swap! Here's a sampling of what I sent to Cari:


I also sent along assorted fabrics, doilies, printed napkins, etc.   If you want to see more, you can go to my YouTube channel and watch the video.  Click here: http://www.youtube.com/watch?v=w22Awy8UPUs    I tried uploading it, but it didn't work.

I also want to share what I bought at the Creating Keepsakes Convention that my daughter and I attended in April in Manchester, NH.  As always, I spent more than my budget allowed.  I just couldn't help it!   I think I'm going to do a separate post for that one.

As I mentioned in the beginning of the post, I've also been making paper flower bouquets for my daughter's wedding.  This is what I've come up with so far:


Sorry about the quality.  I was using my newer camera and I'm still trying to get the 'kinks' out of it.  

Well.....I think that's about it.   I hope you'll stop by soon and check out my purchases at CKC!

Have a wonderful day my blogger friends.

Sunday, January 29, 2012

Random Things To Share

I mailed off two more swap items plus the teacup pincushions.  All of these swaps were over at Your Paper Pantry.  Love that site! 
This was for the Flower Swap for January.  The theme/challenge was to make them from tissue paper.  We had to make three sets of four flowers and we'll get 12 different ones back.  But, I goofed and made four sets of three flowers.  I'm sure the hostess will fix it up for me. 

Here is a video at YouTube of my black and white pages for the "Mini Me A Page" swap:   http://youtu.be/aRwHRskfZMA
I thought that I had taken photos of the black and white pages, but I guess I didn't, so the video is the only way to show you what I made.

Also, on a sad note, we lost our cute little hamster, Coco, yesterday morning.  She wasn't even quite 2 years old.  Just a week ago, she was running around and acting normal and then all of sudden became sluggish, didn't eat or drink and finally passed away.  She was a cutie and we'll miss her.

and, I'm still working on my scraproom.  Today I plan on making a tableskirt from scraps of fabric that I've had for YEARS!  That's about it for now.  I'll share more soon.

Have a great day!

Thursday, December 22, 2011

Paper Crafted ornaments to share


I am linking up today at Pandora's Craft Box Link Party.--http://www.pandoras-craftbox.com.  This week's theme is all about projects we've been working on. Well I made some ornaments for a craft fair a month ago that I'd like to share. Most of these are now hanging on my tree. I can't take credit for these birdhouse ornaments though. These were designed by Marion Smith over at A Piece of Craft dot com. She does sell the template for a few dollars.  


I love birdhouses and these were a perfect addition to my tree. 


I also made some pinecone ornaments that I plan on giving to my sisters and my mom with their gifts.  Each year I try to give them a homemade ornament.  

These pinecone ornaments are not difficult to make, just time-consuming.  If you want to make these, check out my tutorial here:  http://scrapmomsmusings.blogspot.com/2011/12/tutorial-paper-pinecone-ornament.html    I hope you enjoyed my projects for this week.  Thanks for stopping by.  Please stop by Pandora's Craft Box for some inspiration.

Saturday, December 17, 2011

Tutorial: Paper Pinecone Ornament

I originally posted this back in 2009 and thought I'd repost.  These make wonderful gifts for teachers, friends, co-workers, neighbors or even for yourself!   Have fun!

Here are instructions on how to create a Pinecone Ornament.
Materials:
* One (1) 12x12 sheet of patterned paper
* One 3" styrofoam egg
* 18" length of ribbon to match (not shown)
* Dressmakers Pins--also known as bridal or lace pins or even 'common' pins
* Glue Gun
* 12 inch cutter
* Assorted greenery, faux berries, faux pearls, or other embellishments (optional)

1. Start by cutting your pattern paper into 1" strips (1" x 12").


2. Trim those strips into 1 inch pieces. Each piece should measure 1"x1". You will use most, if not all, these pieces depending on how tight you layer your pieces.

3. Next, take your 1 inch squares and fold in the two edges of one side to create a triangle. There should be about a half inch, perhaps slightly less, on the opposite side. I fold all my squares so when I start layering, I'll have plenty.


4. Now you're ready to place these triangles onto the styrofoam egg. Tip the egg so the narrowest part is facing up. Place two triangles with the tips touching at the base and pin in place using the dressmaker pins. You want to place the pins near the very edge and at the corners so they're hidden by the next layer. Next, add two more triangles at the tip to create your first 'row'. See photo below.

5. Continue to layer the pieces, overlapping the triangles as you go around the egg. Make sure you're covering up the pins from the previous row.

6. Keep layering the pieces, as in step 5, and continue in this circular movement until you reach the 'bottom' of the egg, which once decorated is actually the 'top' of the egg, but for layering purposes, I'm calling it the bottom....for now.

This is how it should look:

7. The top might be a bit confusing, but just pin the triangles on until there isn't any white showing. Don't worry about the pins being exposed on the top--these will be covered up by the ribbon and embellishments.
8. Cut your length of ribbon into one 8 inch piece and two 5 inch pieces.

9. Make a large loop using the 8 inch piece and pin the ends to the center of the egg as shown. This is the loop that will be used to hang the ornament.

10. Make 2 smaller loops with the 5 inch pieces, criss-crossing them in the center of the loop and pinning in place.

11. Using the glue gun, add your greenery, faux berries, and other embellishments if you choose. I do this because I think it adds more elegance to the ornament. Have fun with creating your ornament and make it as personal as you like. Put your personality into it.
Here is an example of the finished ornament:


I hope you enjoyed this tutorial. If you have any questions, please contact me via email or leave a comment.

I'm linking up to these parties:
DIY Home Sweet Home : More the Merrier Monday #41
A Fish Who Likes Flowers: Help Save My Christmas Spirit
Craft Junkie Too: TGIF Linky Party #36

Monday, February 14, 2011

Welcome to Day 6 of the "Be My Valentine" Blog Hop

Hello and welcome to the 6th day of the CSD Be My Valentine Blog Hop.  Actually, it's Day 7, but I'm a day late in posting my project.  I will be doing Day 7 as well in  a separate post.  

All week, the Design Team and members of Creative Scrapbooking Divas have been sharing projects to inspire others to create something for their loved ones (or for themselves!).  If you've just come here, not realizing there was a blog hop, please start at SANDY'S Blog.  The main page of Creative Scrapbooking Divas will have the full list of DT's and members in the blog hop.  If you haven't hopped yet, you should, as there are some great projects for Valentine's Day. 

You will have until February 17th to upload your projects to my blog hop thread found HERE.  I have posted examples of all 7 projects.  I will draw a name via random.org for anyone who posts their project(s) in my blog hop thread by February 22nd.  The winner will be notified on February 23rd.  I have a nice little package of scrapping goodies for the lucky winner. 

Now that the 'formalities' are done, let's get on with my project.  Today I made a very simple accent/embellishment that can be used on cards, layouts and altered projects.  Do you remember making tissue flowers as a child?  I do.  It was one of my favorite things to do with my friends.  This is the same process but on a smaller scale.

You will need scissors, one twist tie and an assortment of tissue paper.  You can use one color, but it looks better with 3 different colors. 
Cut your tissue paper into squares (whatever size you prefer).  I did mine in 3" squares.  Then stack them.  I did dark, light, dark, light and added one white square on top (the center of the flower).
Next, fold these into an accordian. 
Wrap the twist tie around the center of the folded tissue paper:
Next, trim the edges into a curved shape:
Very gently, fan out the folds on each side of the twist tie:

The next step, you need to be real gentle as the slightest pull too hard will rip the tissue paper (it happened to me).  Pull each layer towards the twist tie on one side, then repeat on the other.  This is what it should look like:

Play around with the flower to get the shape you want.  I just manipulated it (gently) until it resembled a flower.  You might have to 'squish' it around the bottom as well.

I wanted to add some 'extra' to this to make it look like a real flower, so I cut some leaves from scrap paper and also cut a circle (1") for a base.  Glue the leaves to the base:
Add a dollop of glue to the center and set the flower on top.  Again, be gentle, yet press down to get it to stick.  Use strong wet adhesive.
Note:  If you want to add lace, tulle, or fabric to this for more dimension, glue it before adding the flower as I did above.  This is the final look of the flower:

I hope you'll make some!  These look great on layouts, mini albums, altered projects, tags, gift bags, etc.  You can make these any size you want and you can make them from napkins as well.  I even used dryer sheets!

Thanks for stopping by and have a great day!  Please come back for Day 7's project.

Saturday, March 20, 2010

A Paper Rose and a Layout to share

I just created this rose from a scrap of paper, a pair of scalloped edged scissors and some stickles. I have to give credit to roxycar1 on Youtube though. She makes fantastic flowers out of paper, ribbon, lace, etc. Anyway, as part of the wonderful Design Team over at Creative Scrapbooking Divas, I'm going to use this as a small tutorial on March 28th. Once I share it there, I'll post the directions here. I changed how I created this rose a little differently than roxycar, but it's close.
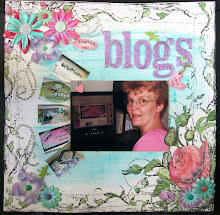
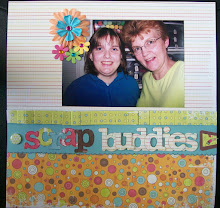
And also on Creative Scrapbooking Divas, I've started a new group--Book of Me. Every two weeks, I'll be giving a challenge to inspire members to get their BOM's started and/or completed! The first challenge was to do an intro/dedication page. This is a photo of me from about 5 years ago but I haven't changed much. This was started at a class I took at my lss but it was plain, so I added the green strip with journaling and the flower embellies.
Well, I'm off to work, but wanted to make a quick post about some recent projects. Thanks for looking!