Showing posts with label make n take. Show all posts

Monday, October 11, 2010

Make N Take Monday 5--CD Mini Album

I apologize for not providing a make n take last Monday.  I wasn't feeling well and just rested for the day.   Today, I have a tutorial for creating a CD Mini Album.  This would make wonderful teacher gifts, stocking stuffers, a way to present a gift card or just to have one for yourself!   I also want to apologize for the quality of the photos.  I was doing this in my bedroom (on the rug!) late last night and the lighting was quite poor.  But, the photos still get the message across.  I hope you'll make some for your friends, family or yourself!   Enjoy!

Here are the materials you will need:

Plastic CD case (make sure it has a 1/4" spine--some CD cases are extremely thin)
Clear Dots adhesive (Zots)
Bone Folder
Trimmer
Double sided designer paper-- 2 sheets of 12x12
Circle Punch (I chose not to use)

Cut all your papers to the following sizes:
     Front Cover:  4  7/8" x 4  3/4"
     Back Cover:  6" x 4  5/8"---score in from each short side 1/4"
     Inside Pages: contrasting paper measuring 4" x 12"--you'll need strips. 
     Mat piece (for back cover):  4  1/4" x 4  1/4"


Gift Card Holder (goes on inside of front cover)
Front piece:  1" x 4  3/4" -- Back piece:  3" x 3  5/8"

Steps:

1.  Remove the plastic piece that holds the CD (this can be tricky, but it's not hard.  Be careful not to crack the spine)

2.  Adhere the front piece (4  7/8" x 4  3/4") to inside of the front cover using clear dots.  (Place the dots in each corner)

 
3.  Adhere the back piece (above) to the inside of the back cover.  Add small clear dots to side tabs so they will stick to the spine and the right edge of the case.  Recrease with a bone folder.  Trim any excess or the cover will not close properly.    Set case aside

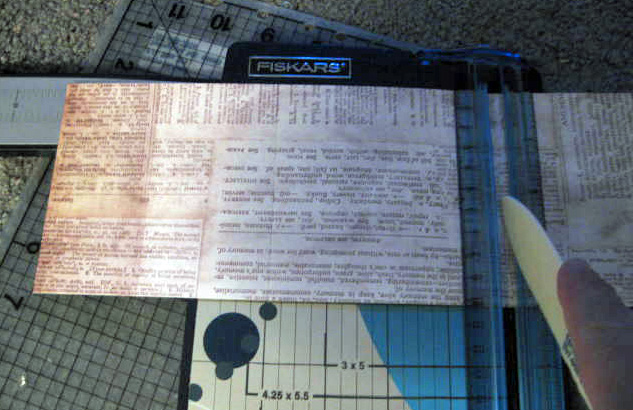
4.  Score the 2  4 x12" strips at 4" and 8"


5.  Fold the 2  4 x12" strips pieces at the score lines (4" and 8")
6.  Attach one end of the strip to end of the other strip by overlapping to create a long accordion strip.

7.  Fold into a booklet and re-crease at the folds. 

8.  Adhere the mat (4  1/4" square) to the inside of the back cover:
9.  Attach the accordion strip to the mat---make sure the bottom part of your album is attached to the mat and that the top accordion fold is to the left (top page)
 
10.  Create a pull tab (using circle punch--optional) by making 2 circles or 2 squares (as I did).  Adhere half of the tab to the center of the top page, making sure that it doesn't overlap the plastic edge (or it won't close).  Match up the 2nd tab and glue to the tab on opposite side.   Sorry if this sounds confusing!
 

11.   How to make the Gift Card Holder for the inside of the front cover:   Score the back piece (the shorter piece) 1/2" along one long side and fold up to create a flap.
12.  Score the front piece of the gift card (2" x 4  3/4"),  1/2" from each side:  
 
13.   With the flap facing up, adhere the bottom of the shorter piece (2" x 4 3/4") to the flap.  Turn over and adhere the side flaps to the back:

14.  Adhere to the inside of the front cover:


Here's the finished product:

Enjoy!  If you have any questions, please ask!  Thanks.

Wishing you a wonderful day.


Monday, September 27, 2010

Make N Take Monday 4--Halloween Matchbook Album

Due to not feeling well over the weekend and because I was so busy last week, I've decided that today's Make N Take will be the matchbook album created for the Creative Scrapbooking Divas blog hop held this past weekend.   I hope you'll create something wonderful from this tutorial.
Here are the steps to create this fun little book:

Gather your supplies:

Paper trimmer with a scoring blade
Patterned paper (heavy weight and double-sided)
Cardstock (1)
Scissors
Pen or Pencil
Paper Piercer
Brads (2)
Adhesive (strong)

*Note: If you don't have double-sided patterned paper, choose a patterned paper and a sheet of cardstock (separate from the other) and adhere together as I did below

Trim off the excess cardstock. Your sheet should measure 4 1/4" x 12"
1. Score and fold the patterened strip. Attach the scoring blade to your trimmer. Set the patterned paper strip in the trimmer horizontally and score it 3 times fromthe left edge: at 1", at 6 1/2" and at 7". Bend at the score marks and fold the strip so it closes like a matchbook.


2. Cut and score your cardstock: Cut your solid cardstock into three strips, each measuring 4" x 12". Set one strip horizontally into the trimmer (the scoring blade should still be attached). Score the strip from the left edge at 5 1/2" and at 9 3/4". Score the 2nd and 3rd strips at 4 1/4" and at 8 1/2"


3. Cut off the smallest section off the end of the first strip (see photo of single strip above)

4. Insert the first strip into the matchbook. Starting with the first strip, insert the largest section, measuring 4" x 5 1/2") into the matchbook and center it under the short flap.

5. Insert the brads to secure. Mark 2 holes on the front of the short flap, about 1" from each end. Pierce the holes with the piercer from the front of the flap through the cardstock to the back of the matchbook. Insert brads from the front of the flap through to the back to secure the cardstock in place.


6. Attach the second and third strips of cardstock. Lay the matchbook horizontally. Take the second strip of cardstock and attach the right-most section (measuring 4" x 4 1/4") over the top of the left-most section (measuring 4" x 4 1/4") of the strip that has already been secured (the first strip).


Take the third strip and attach it to the second strip in the same way. Fold the pages into an accordion (with the moutain and valley folds), making sure that the four middle pages measure no wider than 4 1/4". Note: The left-most page will be 3 1/2" wide.


Now it's time to embellish your book.  When embellishing your album, keep in mind that using lots of thick embellishments will keep the book from closing correctly.  Felt shapes, stickers, and thin metal or acrylic elements work well as long as they're not place in similar locations on each page.  Keep in mind that the spine of the album is meant to hold only a stack of pages less than 1/2".   Here is how I decorated my album:


I hope the directions are clear enough for you.  Happy Creating!