It's that time of year again when the mahvelous, and shabby chic queen herself, Karen Valentine of
My Desert Cottage hosts the 5th annual "
Where Bloggers Create" blog party! I always enjoy this. It's an opportunity for me to visit other scrappers and crafters blogs and get inspired. And, I hope that I inspire others as well. If you've got a crafty/scrappy place you want to share, join in! Click the image on the right side to go there. So, without further adieu, let me start the tour: Oh, let me warn you: This could be a L-O-N-G post because I can get wordy with my explanations. Consider yourself warned--LOL!
My room is in the basement now. I used to have a room on the main floor of a house we rented 3 years ago, but when we bought this house 2 1/2 years ago, I had to resort to the basement. We live in a very small ranch with limited space.
This is what you see when you open the basement door. My room is decorated with alot of flea-market, yard sale and thrift store finds. It's definitely a room created on a budget! I have a desk from my childhood--a Christmas gift when I was 9 years old, that houses punches, instruction manuals and other assorted items. I tried to make my room a bit shabby so I covered the ordinary wooden chair with a king size pillow case! The small table beneath the pink shoe holder is covered in an old curtain valance and pinned in the back. The 'vase' was bought at a yard sale and is filled with spiral flowers I made for my daughter's bridal shower last year. Someday, I'm going to cover that ugly brown pole.

If you look slightly to the right when entering, this is the view. My work table is a 6' long $40 table bought at Walmart (the kind with the plastic top and metal fold up legs). I created a skirt using yards and yards of fabric that I had kept since the 80's when I used to do alot of sewing and before my scrapping days. I trimmed the raw edges with several yards of cloth ribbon. It's held onto the table with velcro tabs. The green bed tray (front) was another yard sale find and holds a vintage sewing basket filled with nice trims. I'll show that later. My husband was wonderful enough to build some 'built ins' around some of my Sterilite containers you can see in the back. My shelves are loaded with stuff.
Note: I have ALOT of scrapping supplies, but a third of them are also my daughter's. Yes, my youngest daughter who is 26 now scraps with me. Let's continue the tour:
As you move forward toward that small table I mentioned above, this is what you see. Here's my desk from my childhood. I used an old strainer to hold mini mini albums from swaps. I also have a collection of heart-shaped rocks that I and my family have found on various beaches here in Maine. My basement room is paneled from the previous owners and the cement floor was painted an awful fire engine red. The only option I had at the time was to cover some of it with a white carpet left over from when my oldest daughter moved out.
Here, you can see the carpet mentioned above. This is standing at the door to the basement, looking completely to the right. My paper stacks were purchased at a close out sale for $25! The black one to the right of the photo was bought at Walmart--I can't remember the name of it. As you can see, I've used an assortment of birdhouses, dried roses, items from swaps and soft dolls to decorate my space.
This is the view looking of my work table. I covered the black desk chair with an old sheet, curtain valance and cushion to give it a more 'shabby' look. I really need to change it though. I've been putting it off for a year now. The Sterilite container in the front holds lots of blank chipboard minis yet to be created. It's rare to see my table so clean, but I did it for the tour. It'll be messy before long.


Here's what I store in the drawers. Lots of mini albums and chipboard!
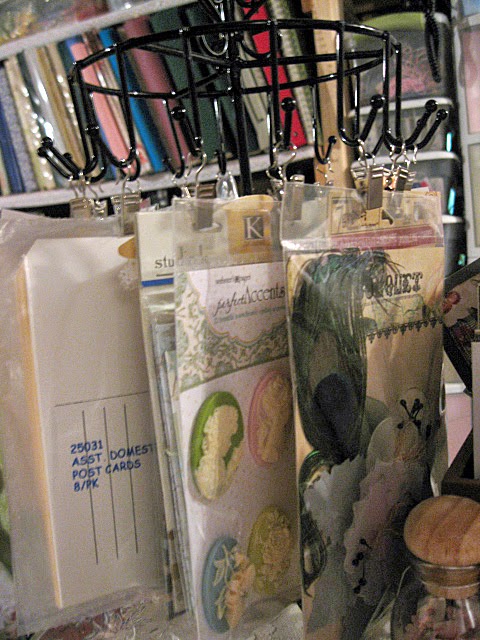
Here you can see another built in made by my husband which holds boxes and boxes of scrapping supplies. More on that later. To the right of the built in is a white bookcase given to us by a neighbor that fits the smaller Sterilite containers perfectly. I covered the fronts of the containers with scrap paper. I thought it gave the room a more co-hesive look, plus I didn't want to see what I had inside--it just made the room look more cluttered. Right in front of the photo is my home-made 'clip it up'. You can find the post here:
http://scrapmomsmusings.blogspot.com/2012/03/my-homemade-clip-it-up.html.
These items sit on a book case by my work table. I used a two tier wire "cupcake holder?" for my Ranger supplies that sits on a lazy susan. Next to that is a box holding all the cards I've received from swaps. Some of them are gorgeously hand made!
The jewelry holder to the far left holds my favorite ephemera--next to that is the box of cards mentioned above and another view of the two tier stand with Ranger supplies. Below shows the white two tier shelf unit--again bought at a thrift store and holds baskets and boxes of supplies that I need within reach when I'm scrapping.
This picture shows another lazy susan that holds an assortment of supplies--eyelets, scissors, glue sticks, paintbrushes, a jar full of blades for my cutter and a two-tier altered can holding pins and such. The troll in the back is the only one left from my childhood---I had dozens of them as a kid. And, in the front is a ceramic purse bought at a yard sale to hold more scissors, pliers, Xacto knives.
Here's the picture of the boxes on the green bed tray that I mentioned above. The black box in the front is from a swap made by LaDonna--it's an altered cigar box. I also have two altered tea cups from swaps that hold stick pins.
This picture is of the vintage sewing basket holding trims that I like to look at. The two bracelets were made from actual vintage typewriter keys made by a friend of mine.
This is the view from the opposite side of the room (built in units). These bookcases came from my girls rooms when they were kids. The white one is crammed with mini albums I've received in swaps or made myself. The brown book case holds smaller paper packs, album sleeves, large chipboard pieces, Project Life items and God know what else! The top of that book case also displays more mini albums. To the left are two book cases that was once part of an entertainment center than I decided to keep for this room when we moved.
Another view of the book cases and my paper racks.
A close up of those mini albums.
Here's a closeup of the bird houses I've been collecting.
This vintage suitcase hold assorted stencils. On top of that sits a metal birdhouse, a metal 'contraption of some sort that I really liked which holds a paper slice of cake received from a swap.
One of the units from the entertainment center which houses empty journals for art journaling, photo albums, decorative boxes holding CD's, Tim Holtz supplies, mini album kits and a whole lot more!
This little black table used to belong to my daughter to hold her computer printer, but I snagged it when she moved to hold my Cricut, my Cuttlebug, Slice machine, binding machine, sewing machine, sewing basket, glass mat and extra cutters.
In order to allow more light and to prevent dust from invading my room, my husband put up sheeting mostly to cover the ugliness of the ceiling.
My Inspiration Board which needs to be updated.

This is what's hidden under that table. I used a white sheet to cover the table. The Sterilite container holds my embossing folders, dies and binding supplies.
For many years I was collecting teddy bears. They now preside here in my room.
This wooden unit holds some of my favorite stamps. The wooden house was made as a bird house.
As mentioned before, I cover the inside of the Sterilite containersthen used labels from Michael's. Some aren't labeled because they're empty right now---which is hard to believe considering all the supplies I have--LOL!
This is a simple stamp storage on the side of the unit from the entertainment center.
These are the containers that fit into the white bookcase mentioned earlier.
My button collection
A view from the middle of the scrapping area. The strainer holding punches on the table has been changed:
My Big Shot and paint spinner take up a good portion of the table against the back wall.
Since the other pic of this table was taken, I've added my daughter's bridesmaid bouquet which I made for my oldest daughter's wedding last August. I made 5 bouquets made entirely of paper flowers.
The unit from the entertainment center showing the Sterilite container covered with paper.
The back wall with table holding my Big Shot, paint spinner and homemade clip it up. The tall white bookcase holds photo albums, buttons, jars of beads, necklaces, lace trim and assorted baskets holding a wide variety of other supplies.
The top of these Sterilite containers hold my Fiskars trimmer, my new envelope punch and Score Pal.
And, I wasn't sure if I was going to share this, but I decorated the beam with an old rose garland and a paper garland from my daughter's shower. The wooden frame is hung there to eventually display photos that I'll hang from the wire hanger. My room is always evolving. I'm glad you hung out this long to view my basement scraproom. I hope you'll visit more often and please check out my other posts.
Thanks for visiting!







 Posts
Posts